Asanas & Physical Moves
Yoga Therapy for Lower Back Set
For Lower Back Pain sufferers and teachers: The rule of thumb is, if it hurts, don’t do it. Listen to yours and your student’s pain signals and if necessary move on to the next exercise. You will find that some of these exercises are painful, but others offer a welcome relief. Work with those that suit you, and you will help the lower back heal naturally.
Remember to incorporate breathing, inhale and exhale slowly and in a relaxed way through the movements and the static poses.
Keep on reminding yourself that this back ache is just a reminder of something that needs attention (sitting for too long in front of the computer, driving for too many hours, sleeping on the wrong mattress, traveling on airplanes, too much high impact sport, and emotional or mental stress, amongst others…)…but you are already offering yourself a solution. Doing your back exercises is just the beginning of the changes you need in your life.
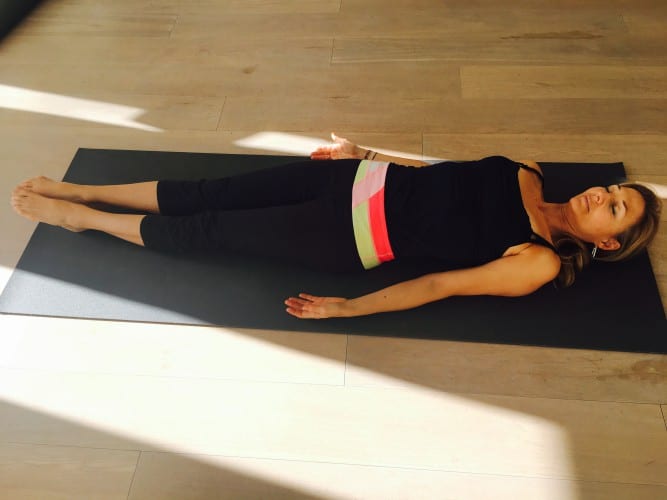
As before, pointing the toes away, press the heels on the ground. 3 breaths. Repeat this movements stretching the feet back and forth 6 times.

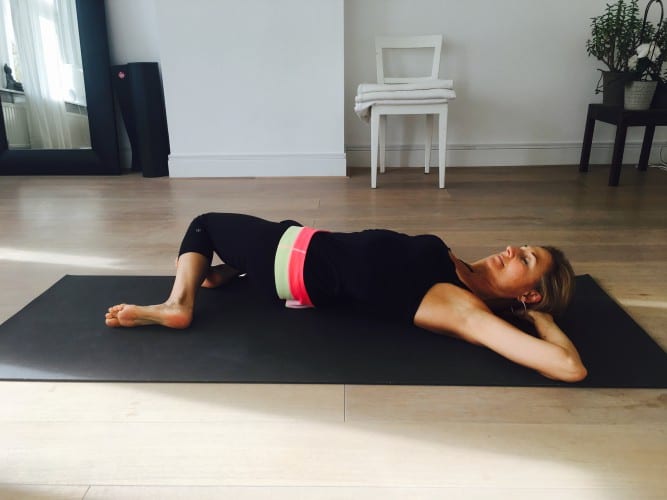
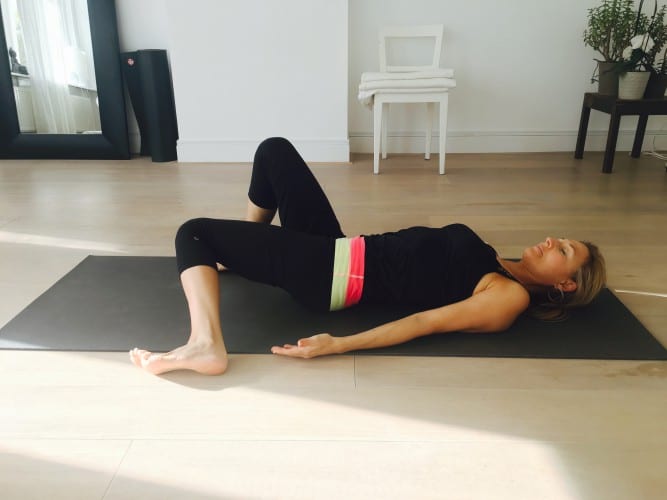
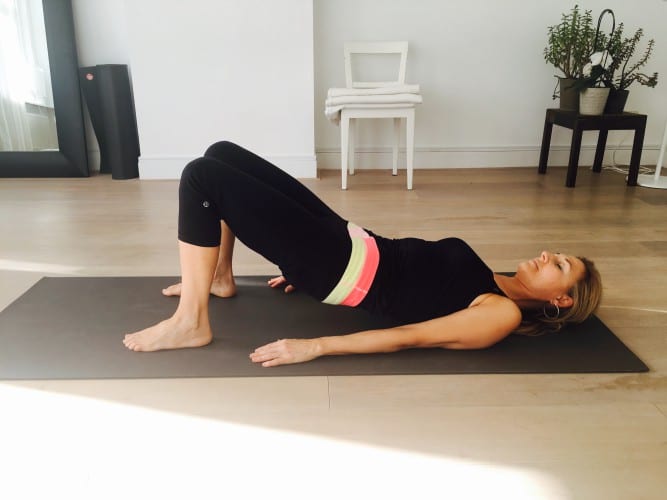
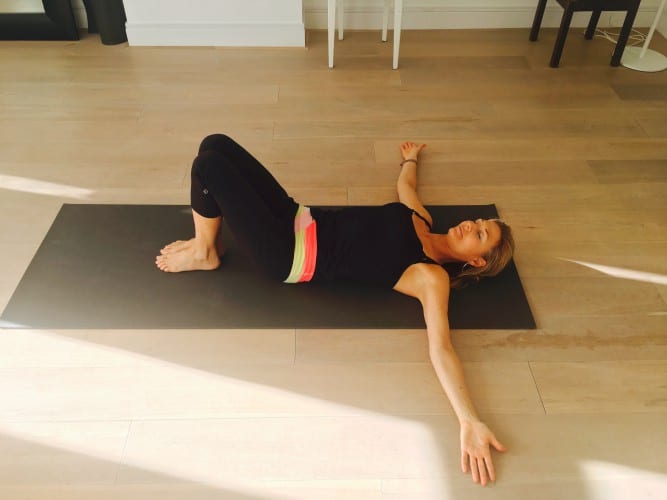
Lower back muscles and spinal extension and flexion. Bent knees at hip width and feet on the ground. Inhale lift the lower back, exhale press the lower back on to the ground until the exhalation is finished. Gently inhale and lift the lower back again, in a wave-like moment, repeat inhaling and exhaling and lifting and pressing the back on the floor, 6- 8 times.
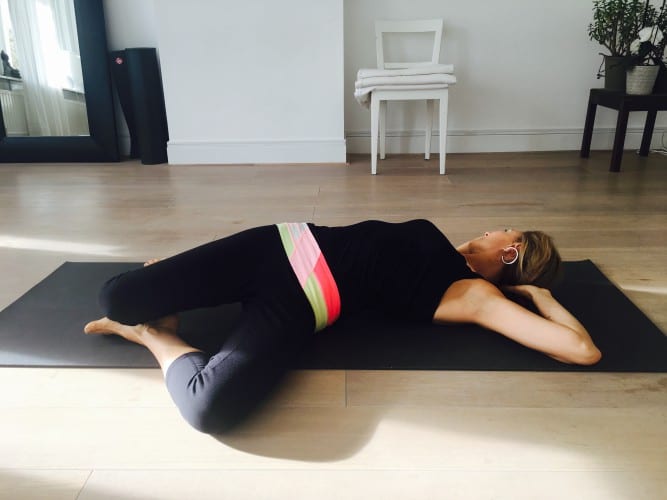
Hip opener and hip flexors stretch. From a neutral position with legs bent and feet on the floor, gently drop the knees to the side. Hands behind the head. This is a belly opening position, so breathe in the belly 3 times and change to the other side.
As before, drop the legs slowly to the other side. Here it is shown with the head turned to the opposite side, which is also an alternative. 3 breaths and repeat this cycle 3 times.
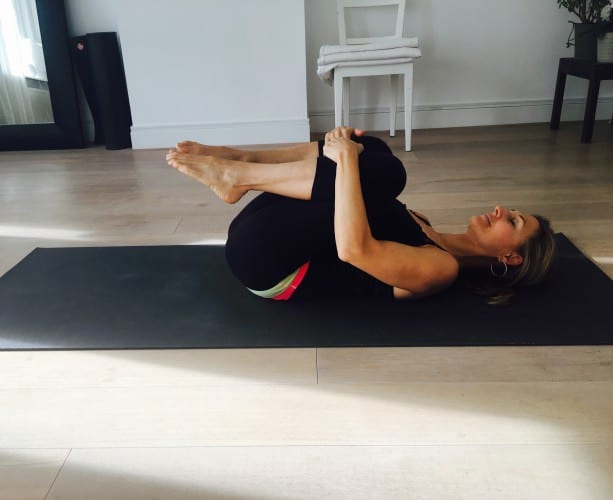
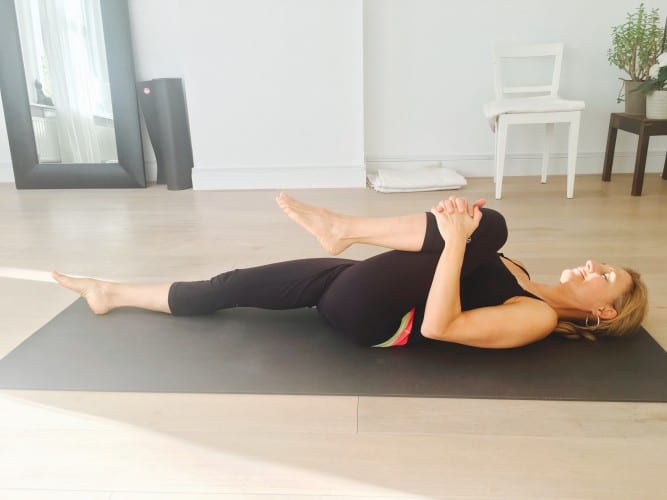
Quadratus Lumborum and lower back muscles stretch. Knees to the chest and hold them without force. Rock gently form side to side and give the lower back a soothing massage. *Not suitable for herniated disc
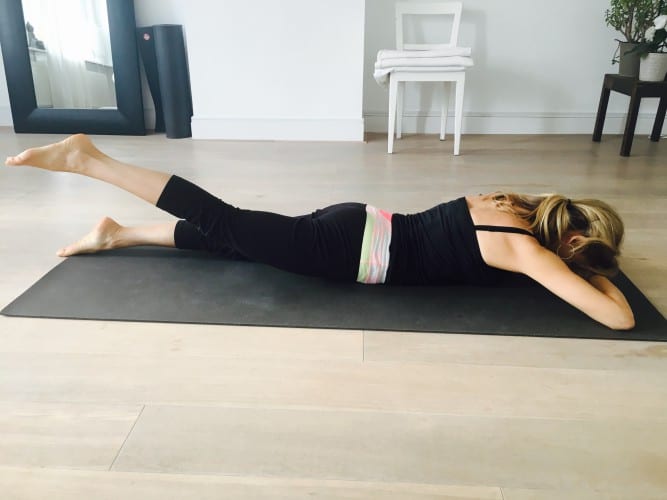
Hip flexor lengthening and gluteal muscles strengthening. On the belly, in this position you can check if there is an imbalance in the pelvis (SI joint), as one leg may lift further than the other or one leg might feel “stuck”. Inhale lift the leg with a feeling of “lengthening” rather than lifting! Exhale come down and change leg. Repeat 8 times. 4 each leg

As before, with the other leg. make sure not to tense the shoulders up…
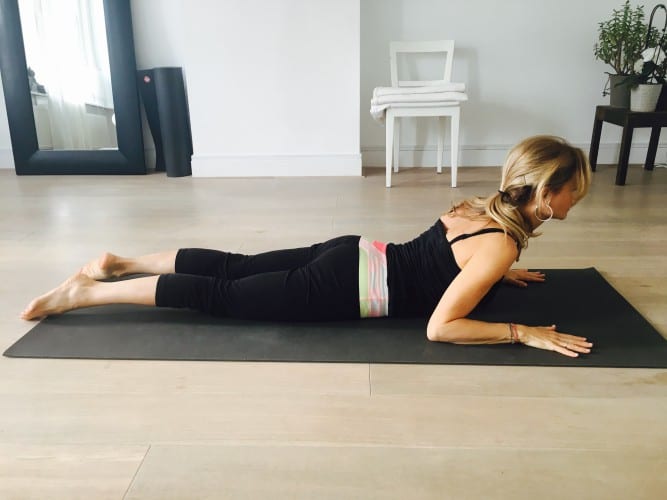
Erector spine strengthening.Press the pelvis on to the floor and lift te upper body using the back muscles, not the shoulders/hands. you should be able to lift the hands off the ground and the body still stays up on its own. 6 breaths.

The same as before, with the head neutral facing the ground (not dropping it down) if the neck is sensitive.
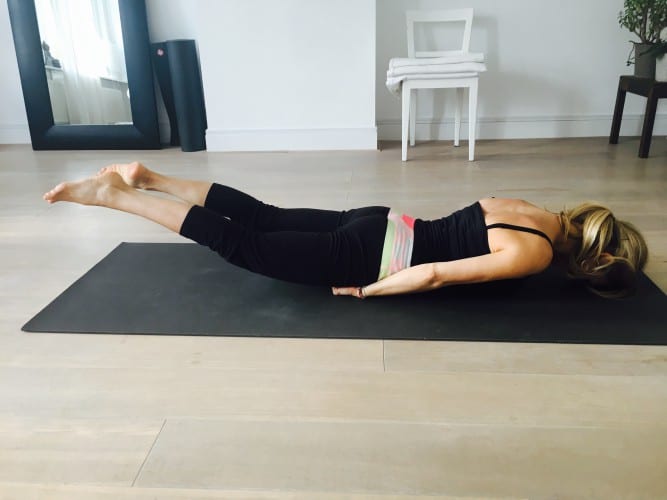
Gluteal muscles strengthening. Locust variation without lifting the legs too high, fists under the top of the thighs -find a comfortable place, the legs should lift on their own when you press- shoulders relaxed and forehead on the floor. 4-6 breaths
Quadriceps stretch, holding on to the foot and gently pressing the hip on to the floor, without force. Simply breathe on to the belly and the stretch will happen on its own. 8 breaths each leg.
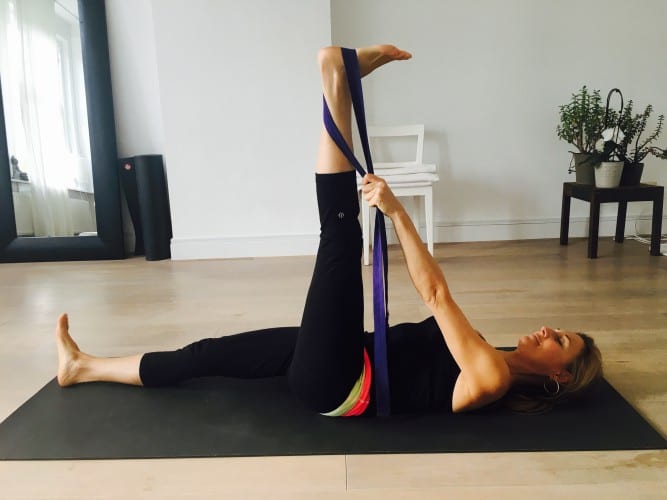
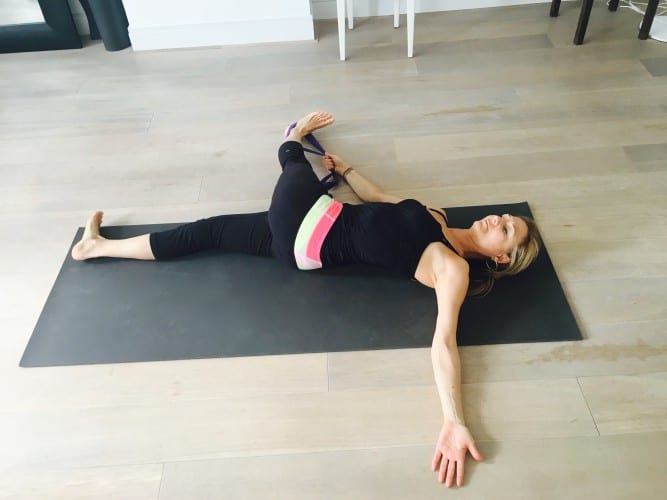
External hamstrings stretch. Holding the belt from the outside of the heel, arm stretched and relaxed. Push the heel up, and the hip of the lifted leg sliding away from your head. The stretched leg is active and heel pushing also away. The stretch should be felt on the belly of the hamstring (mid way at the back of the thigh). If it is felt at the back of the knee, bend the leg until the stretch is felt in the back of the thigh. 6- 8 breaths. *not suitable for herniated disc
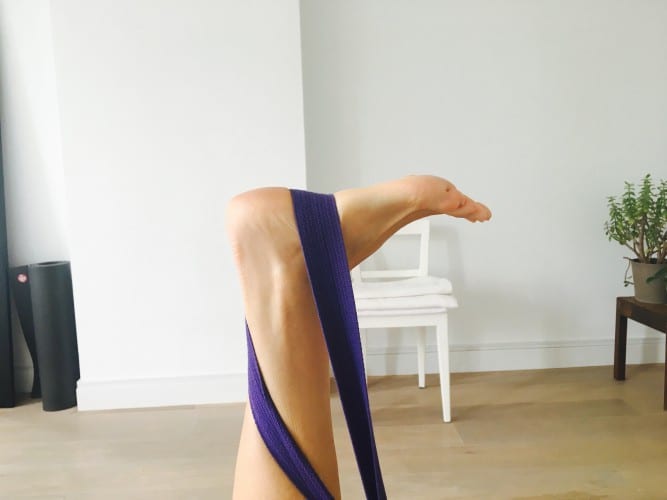
Detail of belt wrapped to the outside of the foot.
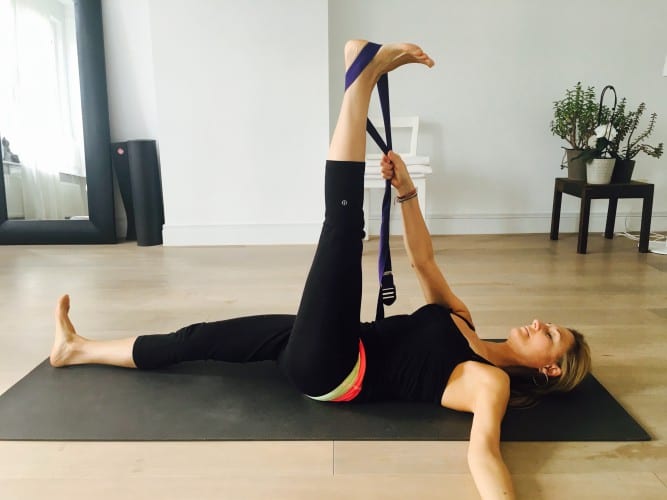
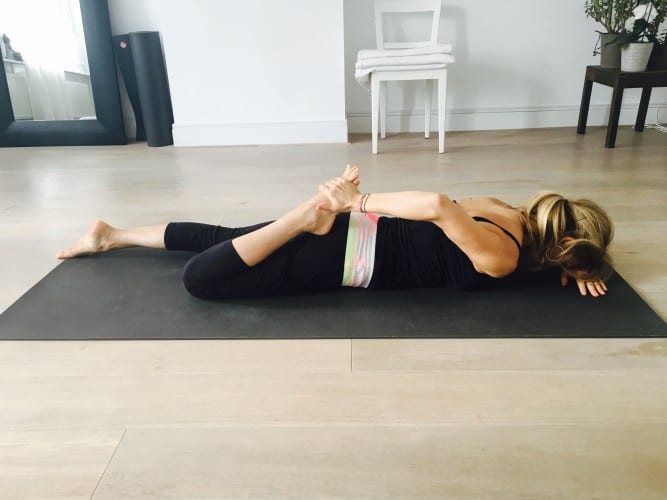
Medial hamstrings stretch. Now we wrap the belt form the inside of the foot. Hold with the opposite hand, arm relaxed and long. Push both heels away from you, the hip of the lifted leg sliding away from your head. 6 – 8 breaths. *Not suitable for herniated disc
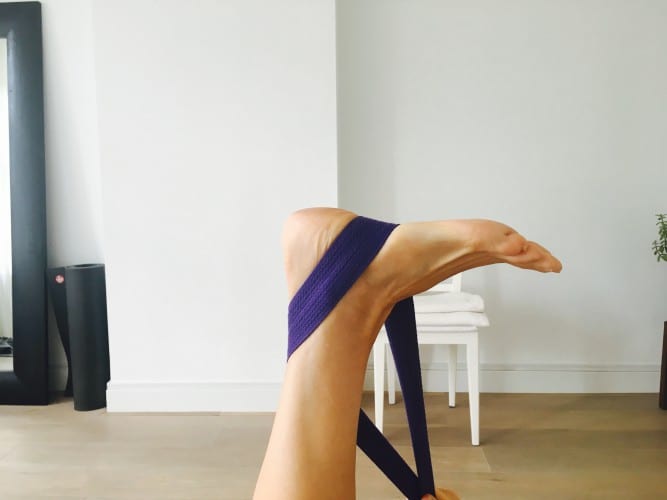
Detail of belt wrapped around the inside of the foot.
Gluteal, hamstrings and QL muscles stretch. To get to this position please bend the knee first, take the leg to the floor and then stretch the leg away from you. Feel that the leg is lengthening away from you from the buttocks to the heel. The upper part of the body is lengthened across the floor. 6-8 breaths * Not suitable for herniated disc
Hip opener and hip flexors stretch STEP 1. Legs bent, feet hip-width art. Walk the left foot to the side slowly, slowly dropping the knee inward until the thigh is in line with the spine. Push the heel away from you.
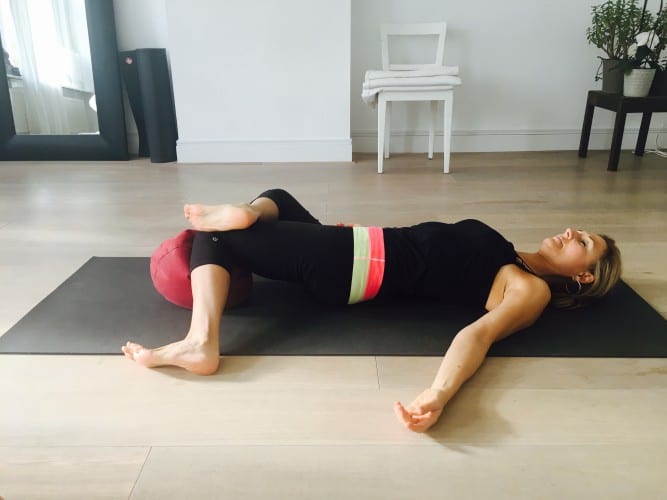
STEP2. Place right ankle on top of the left leg, just above the knee. If the knee is sensitive, place a high cushion underneath (see image). Both feet are pushing the heels away. Left thigh is lengthening away from you, making the body long and stretching the belly . Take 6 breaths and change to the other side.
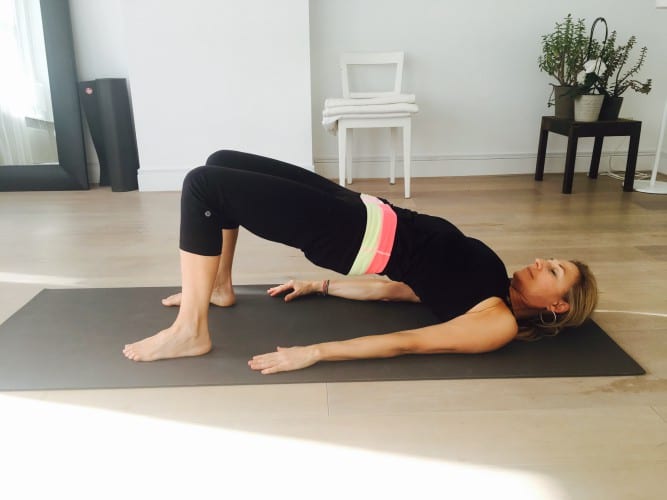
Gluteal muscles strengthening and SI joint stabiliser. Begin with legs bent and feet on the floor hip-width apart. Inhale in the belly first, then exhaling roll back up lifting the buttocks up to be on line with your knees, belly flat. Do not lift high in a back bend, the spine must be on a straight line. Inhale, then exhale roll-down to the floor vertebrae by vertebrae, from the top of the spine to the base. Inhale, then exhale and come up again as you exhale. Repeat the cycle for 6 times. Keep the knees and feet parallel.
As before, details of rolling down movement on exhalation.
Lying down twist for LBP. STEP 1. Knees together and feet together, lower back on the floor with arms on the sides.
STEP 2. Exhale turn the whole body to the side including the arms.
STEP 3. Keep the legs on the side and roll the upper body to the side in a twist. This is twist keeps the SI relatively safe, as the legs are kept together. It is suitable for the recovery period of SI joint sydrome and herniated disc.
QL stretch. STEP 1. Bring the knee to the chest.
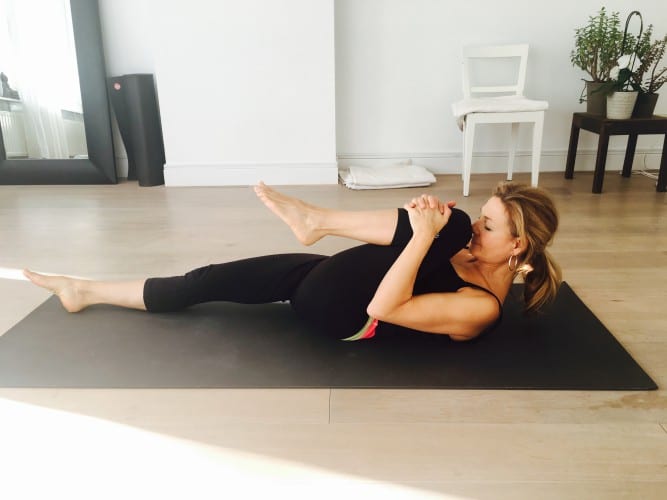
QL Stretch 2: Bring the nose to the knee on an exhalation and release. Repeat each leg 3 times.

Baby pose. Lower Back stretch. With Lower Back Pain we must avoid forward bends with the legs straight. *This baby pose is suitable for all back pain except acute stages of herniated disc. Breathe in the belly for 6-8 breaths.
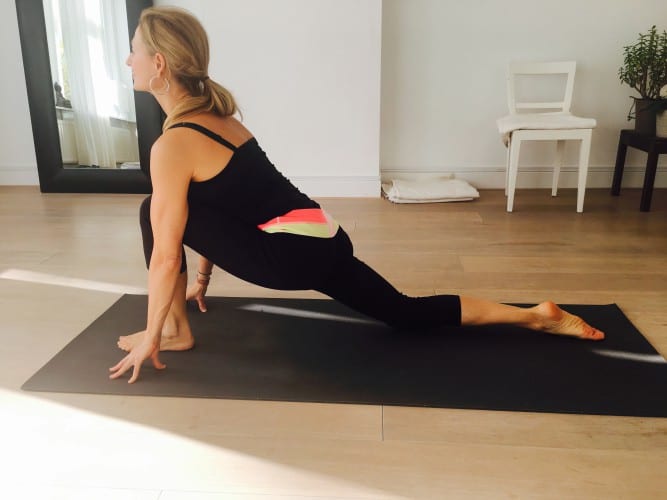
Hip flexors stretch. Bring the foot forward so the leg is at 90 degrees, take care not to push the knee forward in front of the foot. Sink the pelvis down and forward, and come on to your fingertips to lift the front of the body. You may use bricks under the hands. 6 breaths each leg. * not suitable for acute stage of herniated disc.
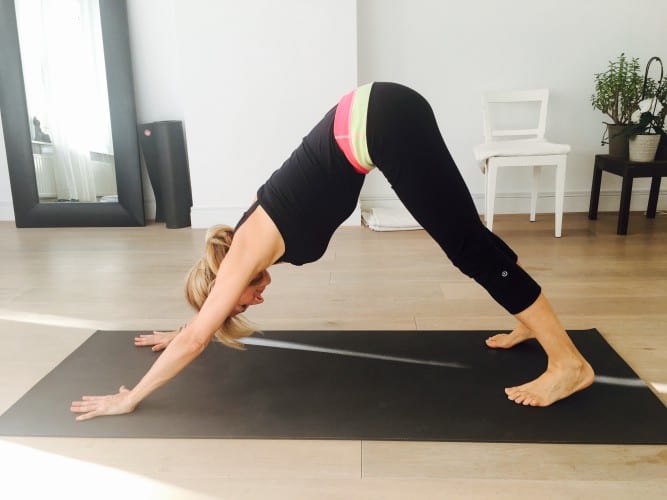
Downward dog. Spine lengthening and strengthening of back muscles. Thumbs and index fingers must be pressed on the ground (this automatically makes the shoulders open), chin slightly to the chest and head neutral. Abdomen pulled in under the belly button and raise the end of the femurs (top of the legs) upward. The back must be straight, so pressing the heels on the ground is irrelevant. If necessary, bend the knees slightly until the spine is on a straight line. *Not suitable for herniated disc

Gluteus medius and Serratus Lumborum stretch. If you stretch to the side and slightly forward you also stretch the QL’s. You may use cushion support if your hips rise off the ground. 3 breaths each side, then change the direction of the legs (the right goes to the back and the left to the front, or viceversa).
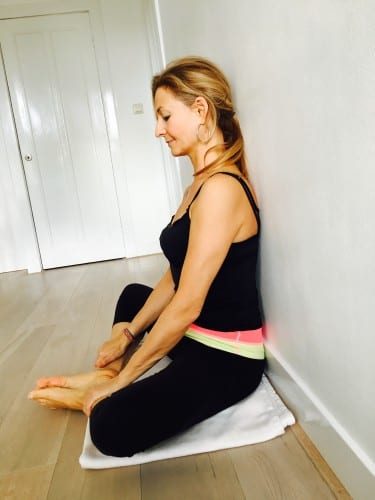
Adductors stretch with back straight. Use wall support for any exercises that require sitting with straight back, specially when the hip flexors and the adductors are tight. 6-8 breaths.
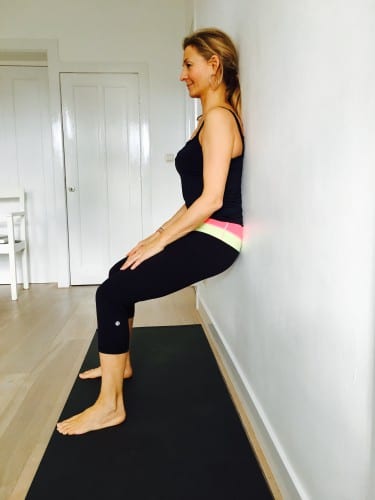
Wall supported back reliever. This s great isometric exercise can be done in the office or at any moment when the back feels tired. Use the power of the legs but don’t go down too low, because otherwise it becomes a squat, which is not the point here. Push slightly from the feet to press the lower back against the wall. Keep for 6-8 breaths. try to keep the shoulders neutral.
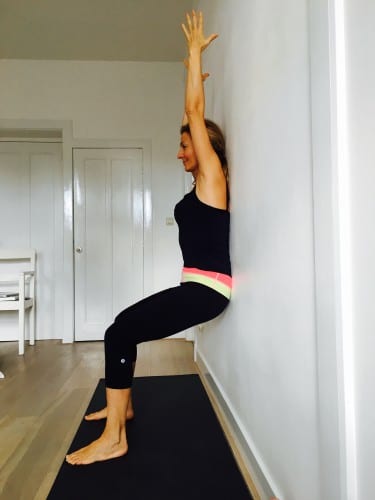
As before, arms raised for back strengthening. The arms don’t need to touch the wall behind, keep them neutral and elevated for 6 breaths, and you will notice your back muscled working hard! Make sure the lower back is against the wall all the time. Good luck computer users…
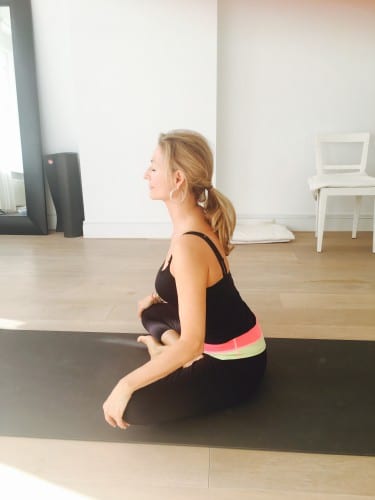
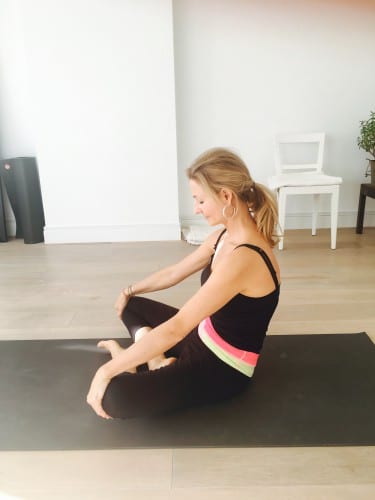
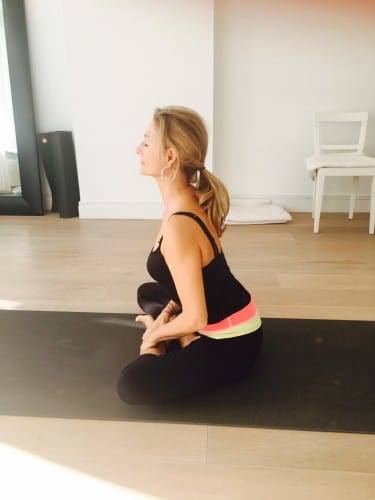
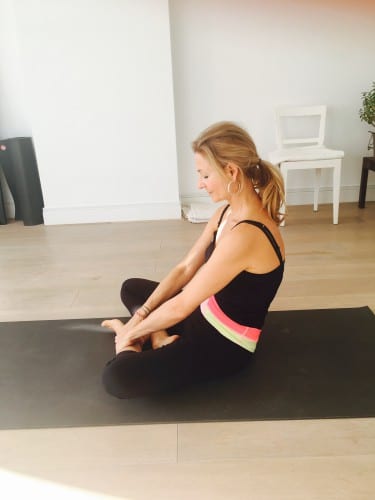
Kundalini Rocking Exercise for the Lower Back.
This exercise saved my back many years ago and it keeps on saving it. You can also do it siting on chair. Inhale rock forward, exhale rock back. As many times as you like during the day or at the end of this set.


Leave a Reply